Loot Editor for DayZ
Welcome to the official documentation for the Loot Editor for DayZ. This guide covers everything from your first file open to advanced features like mass editing and smart import.
New to DayZ server administration? Start with the Opening Your First File section to get up and running in minutes.
The Loot Editor is a professional desktop application designed to make editing DayZ
types.xml
files fast, safe, and intuitive. Instead of manually editing thousands of lines of XML, you get a
powerful visual interface with real-time validation and error prevention.
Installation
The Loot Editor for DayZ is available exclusively through Steam.
- Visit the Steam Store page
- Purchase and install the application through Steam
- Launch the Loot Editor from your Steam Library
System Requirements: Windows 10 or later. The application is lightweight and runs smoothly on any modern system.
Opening Your First File
There are several ways to open a types.xml file in the Loot Editor:
Option 1: Drag & Drop
Simply drag your types.xml file from your file explorer and drop it onto the
application's
start screen. The editor will immediately parse and display all items.
Option 2: File Menu
Use the standard file open dialog via the application menu to browse for your types.xml
file.
Where to find your types.xml: Your server's types.xml is typically located at
DayZServer/mpmissions/dayzOffline.chernarusplus/db/types.xml for vanilla,
or in the corresponding mod folder for modded items.
Data Grid
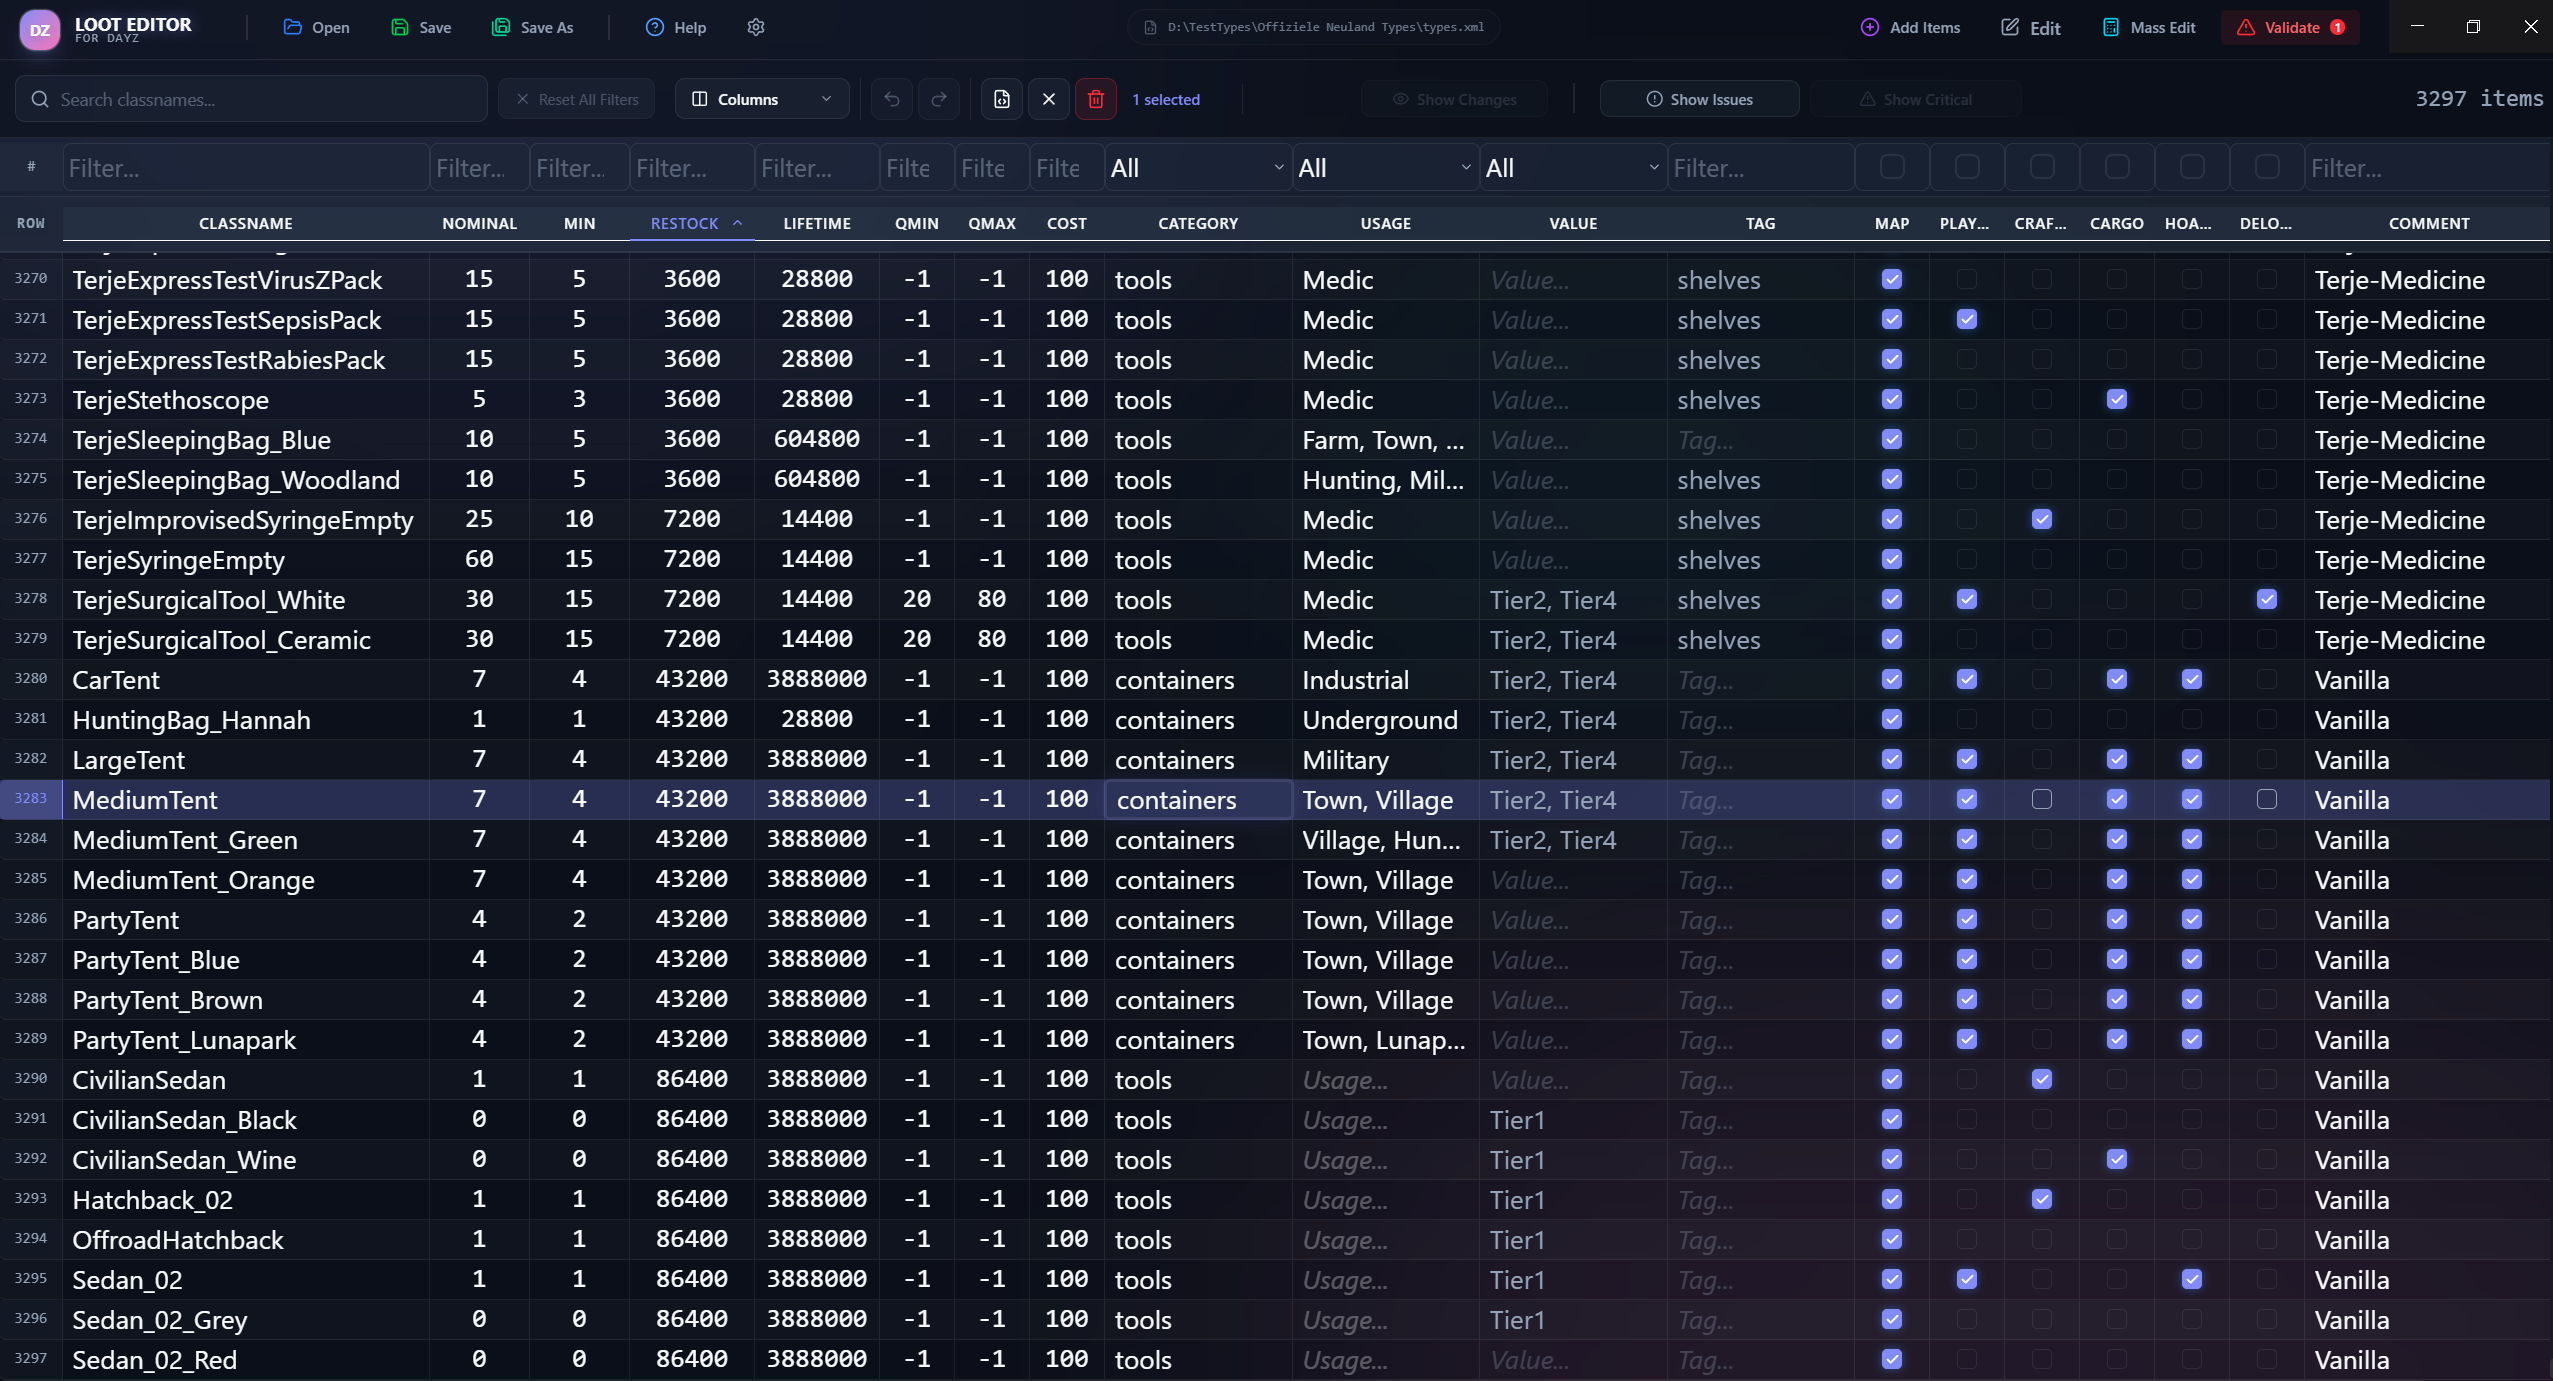
The Data Grid is the heart of the Loot Editor. It displays all items from your
types.xml
in a spreadsheet-like table, with each column representing a different XML parameter.
The grid uses advanced virtualization technology, meaning only the rows currently visible on screen are rendered. This allows the editor to handle files with 10,000+ items without any performance issues.
Grid Features
- Sticky Headers: Column headers and filter rows remain fixed at the top as you scroll
- Zebra Striping: Optional alternating row colors for better readability
- Column Visibility: Hide or show columns based on your needs
- Error Highlighting: Rows with errors are highlighted in red
Editing Cells
To edit any cell in the grid, simply double-click on it. The cell will switch to edit mode, allowing you to type a new value. Press Enter to confirm your change or Escape to cancel.
For numeric values (like nominal, lifetime, etc.), the editor validates
your input to ensure only valid numbers are accepted.
Caution: Changes are applied immediately to the in-memory data. Make sure to save your file when you're done to write changes to disk.
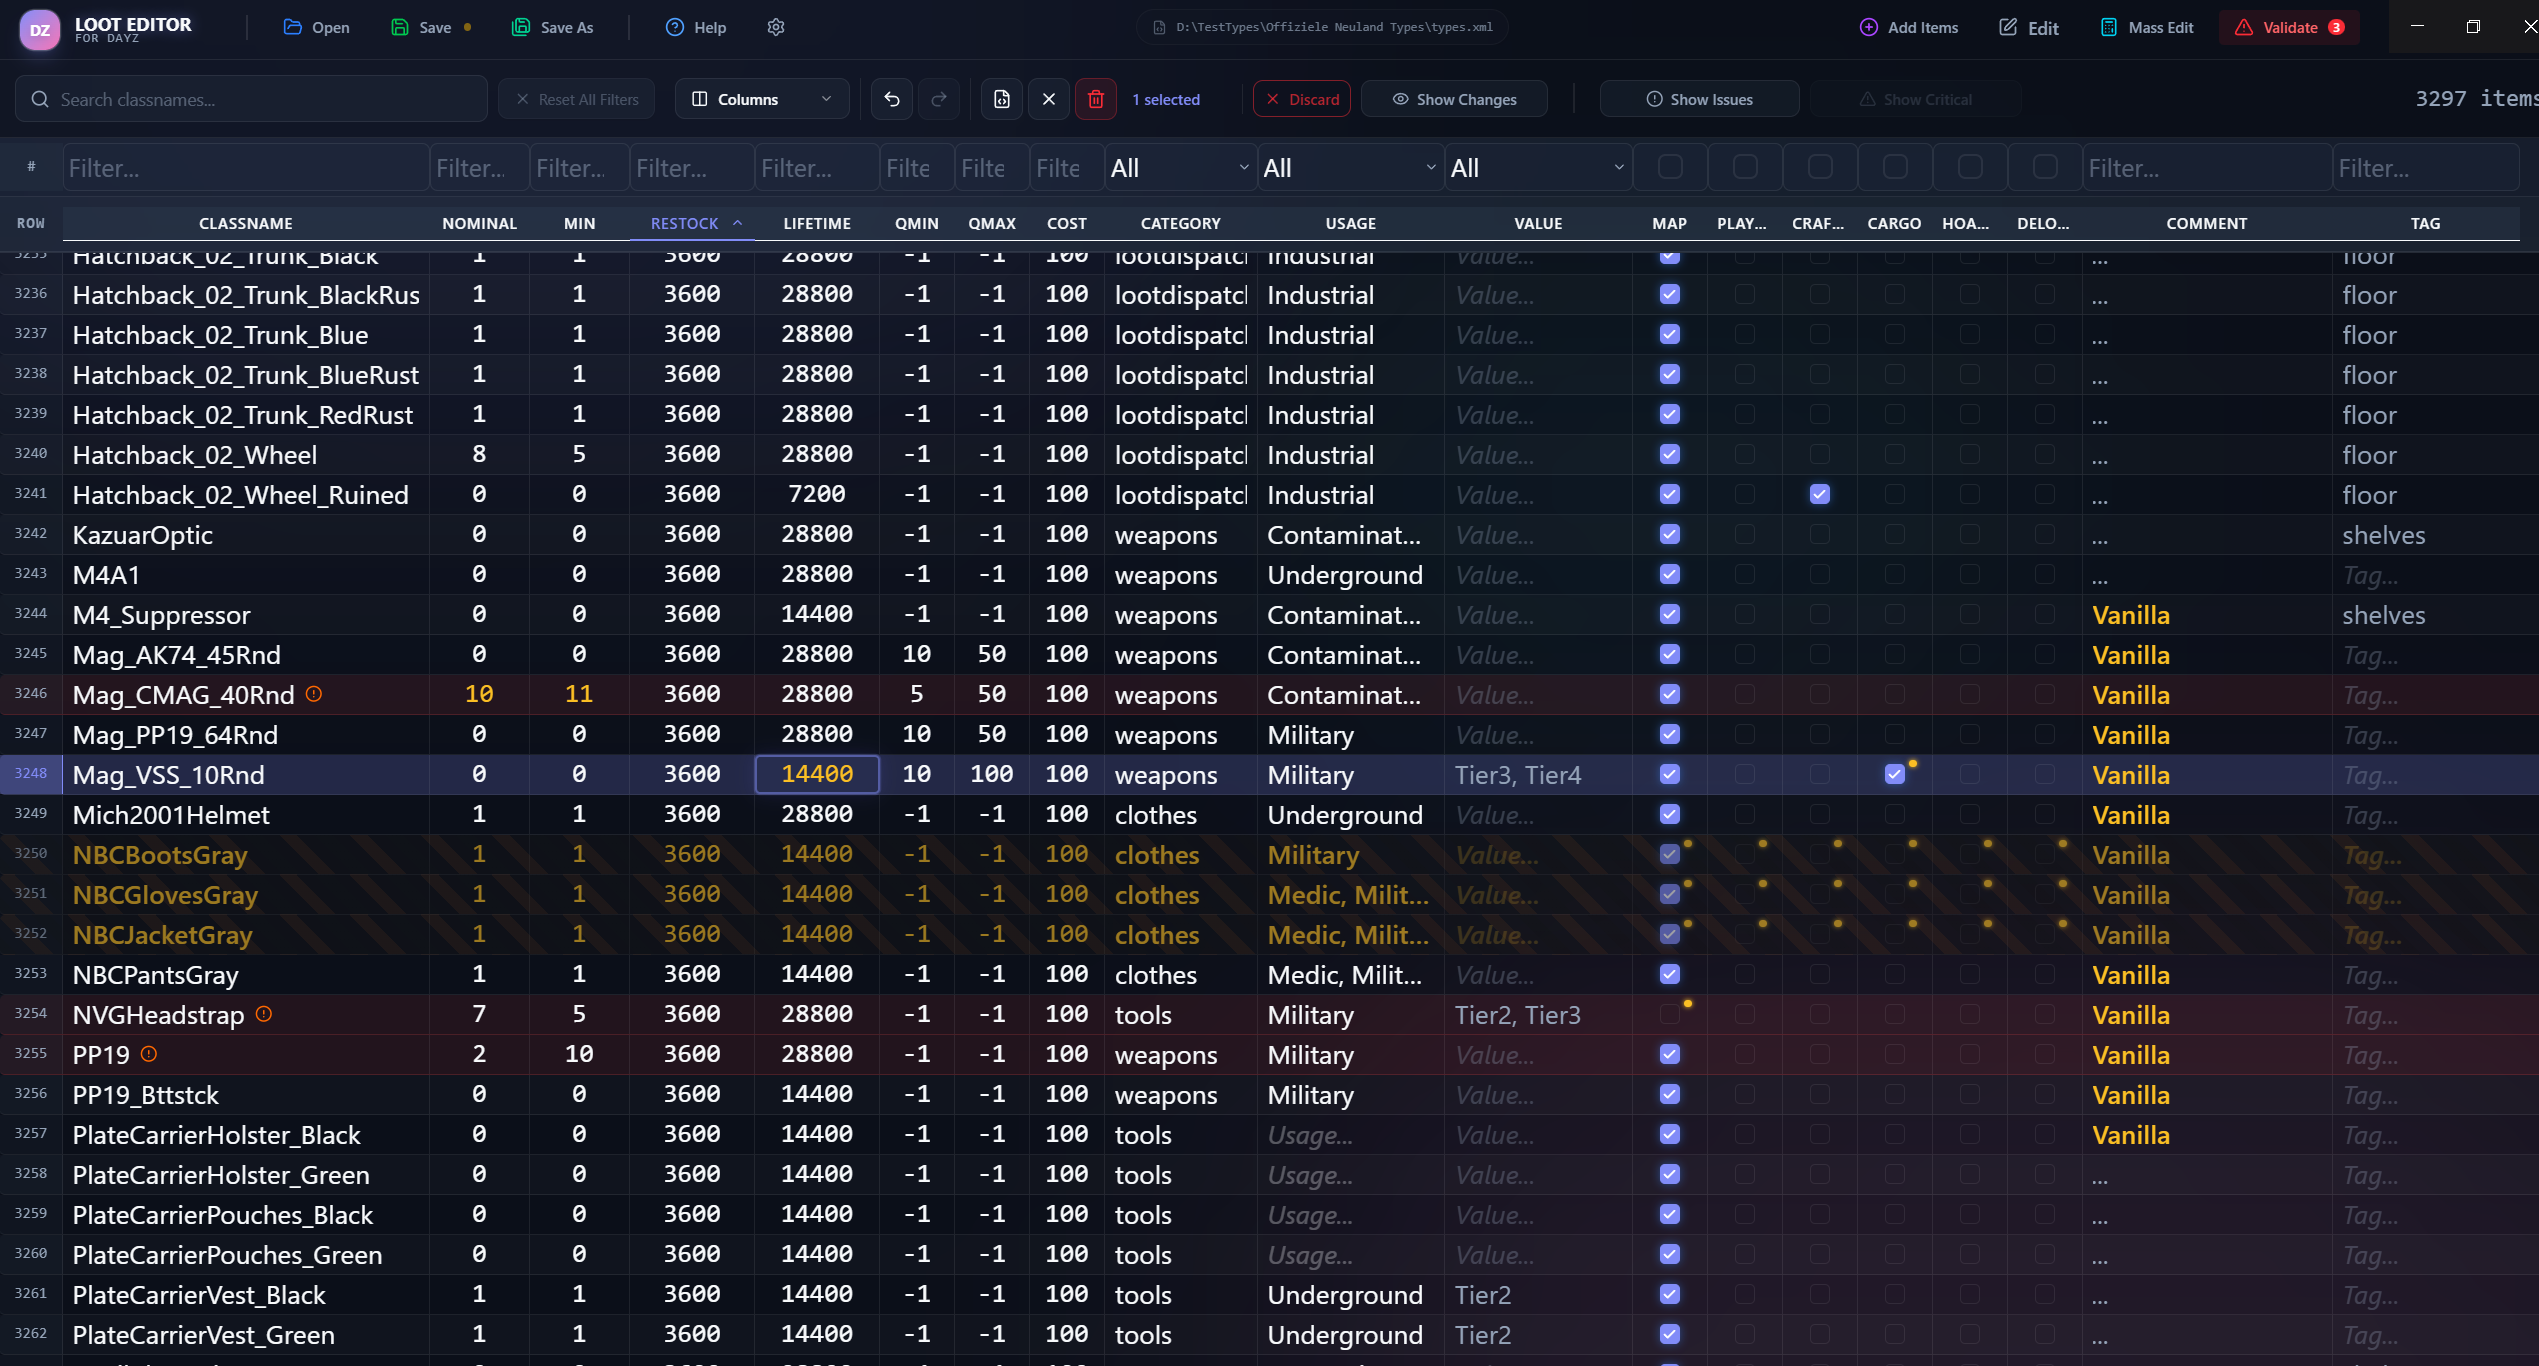
Filtering & Sorting
.png)
Each column in the grid has its own smart filter. Filters are located in the fixed row below the column headers, so they're always accessible.
Filter Types
- Text Filters (Classname): Type to search by item class name. Matches are case-insensitive.
- Dropdown Filters (Category, Usage, Value): Select from available values, including a special "No Value" option to find items missing assignments.
- Numeric Filters: Filter by exact values or ranges for numeric columns.
Sorting
Click on any column header to sort the grid by that column. Click again to reverse the sort order. A third click removes the sort and returns to the original order.
Mass Editing
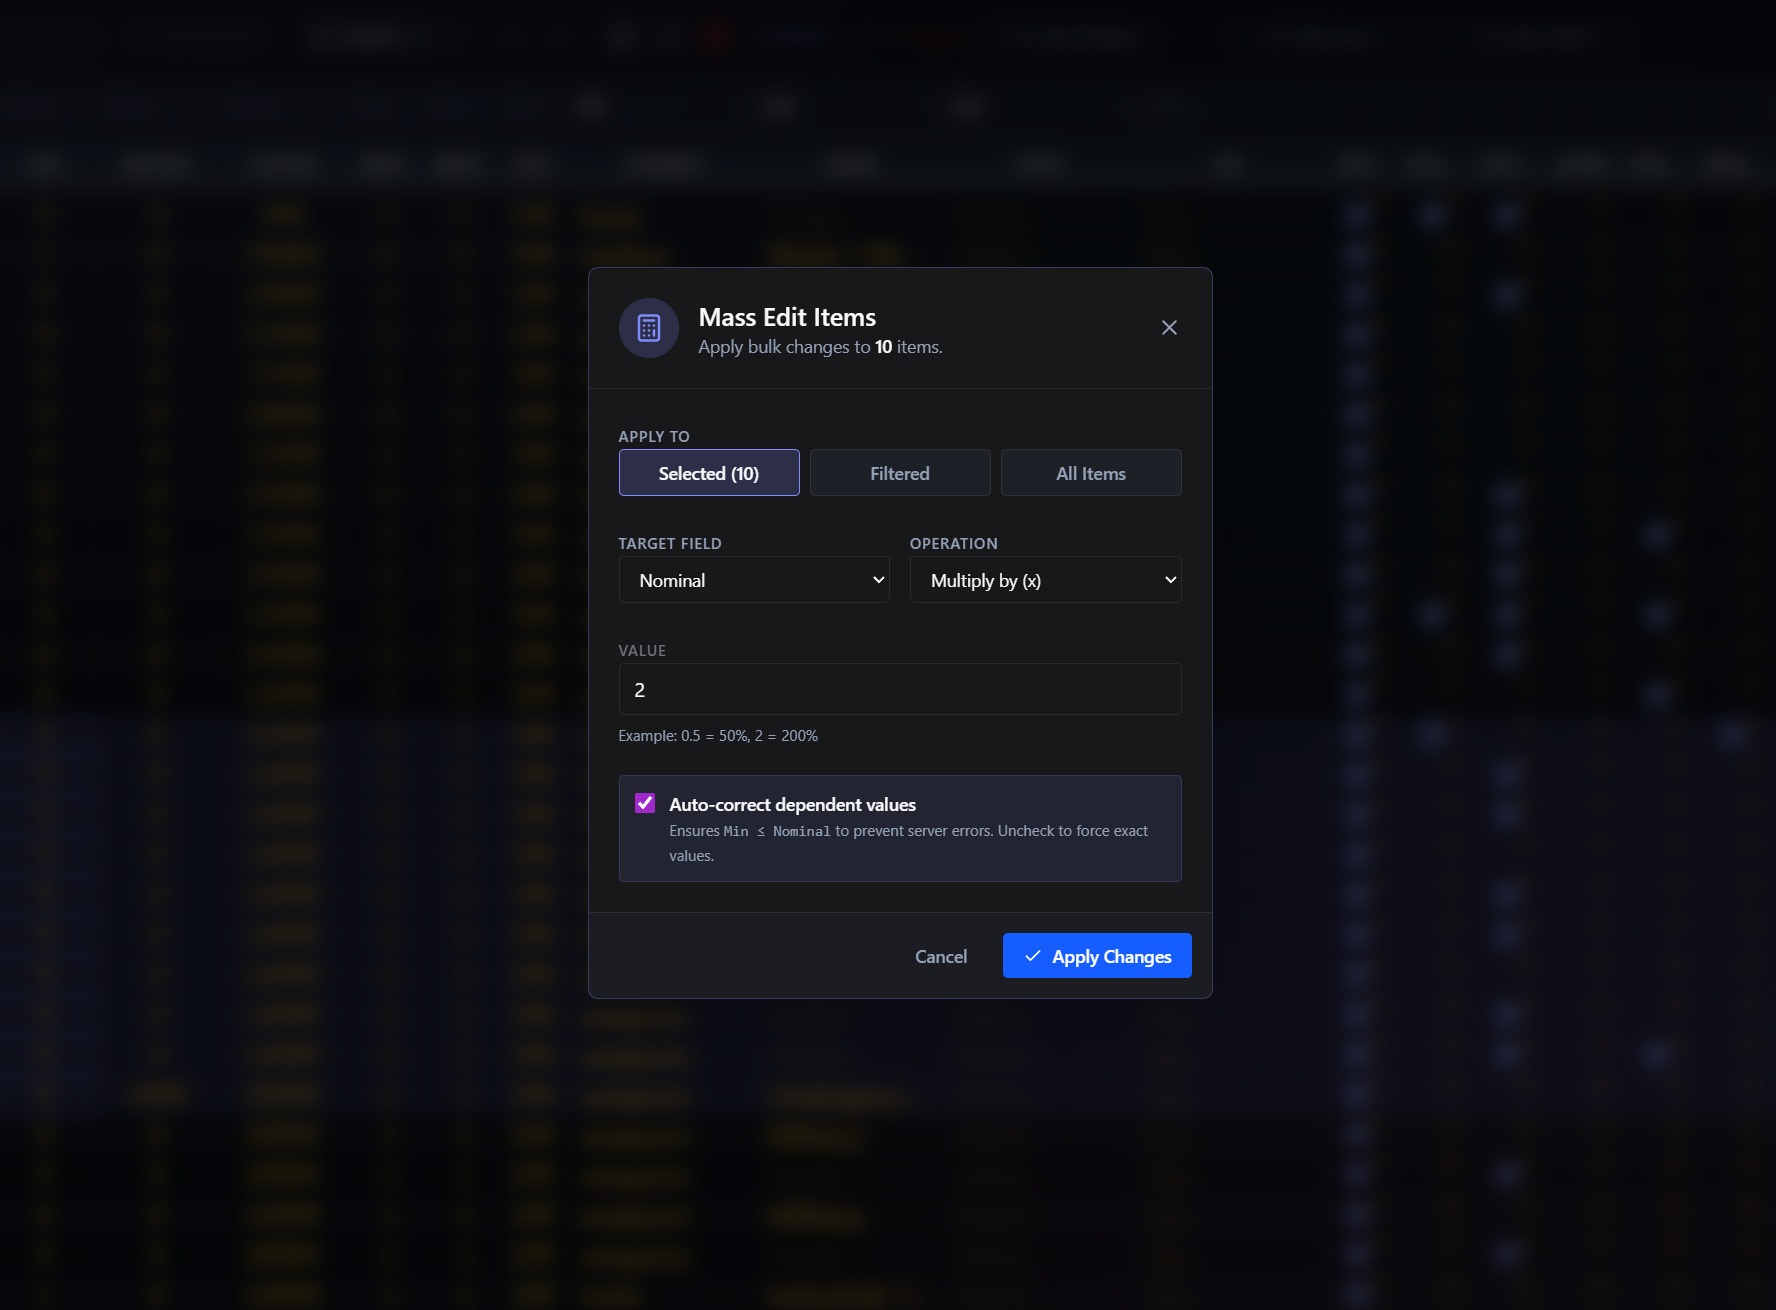
The Mass Edit feature is one of the most powerful tools in the editor. It allows you to modify multiple items simultaneously, saving hours of manual work.
How to Use Mass Edit
- Select Items: Click on rows to select them (use Shift-click for ranges, Ctrl-click for individual items)
- Open Mass Edit: Click the "Mass Edit" button in the toolbar
- Choose Parameters: Select which columns to modify
- Set Values: Enter new values or percentage adjustments
- Apply: Review and confirm your changes
Pro Tip: Use filters to narrow down items first (e.g., filter by "weapons" category), then select all filtered items for mass editing. This is the fastest way to adjust loot parameters for an entire item category.
Import & Merge
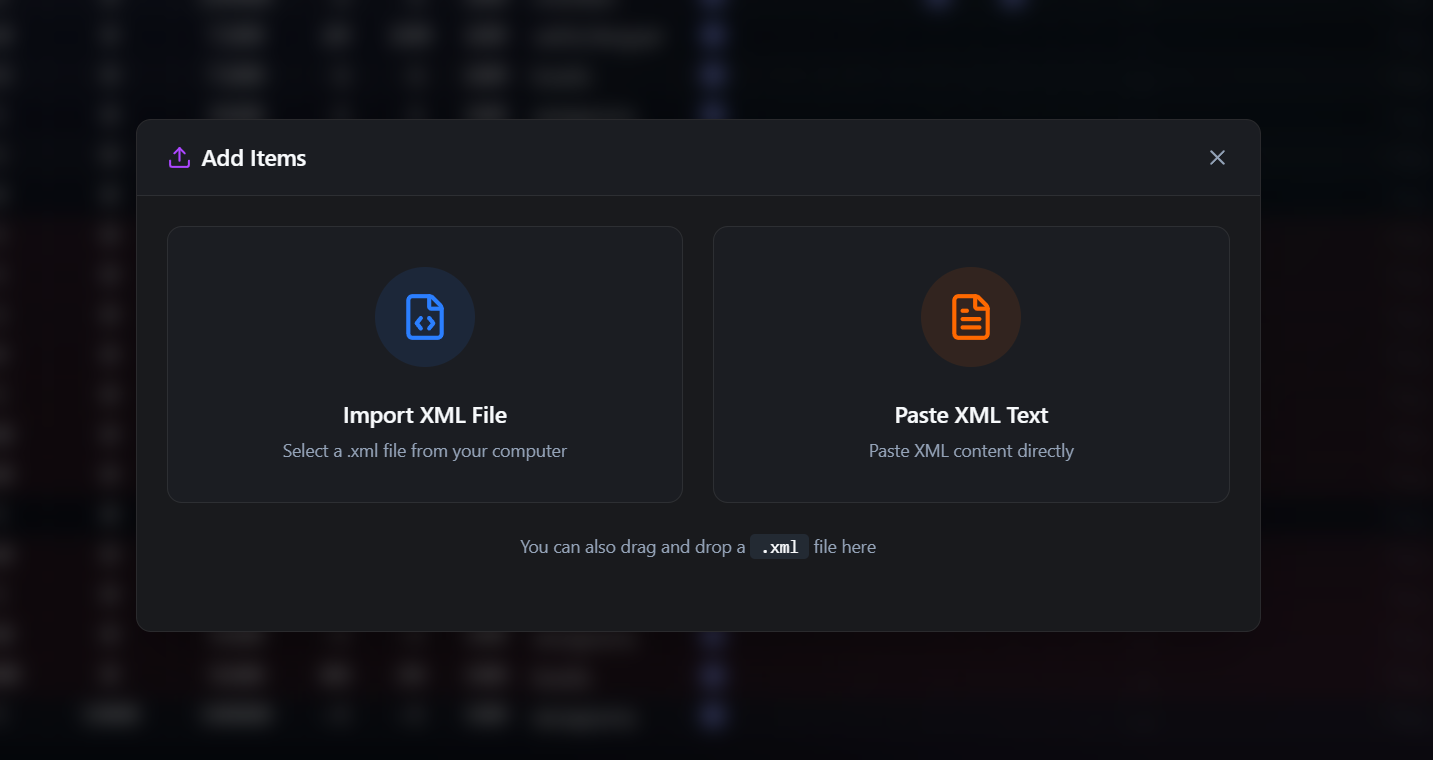

When you add a new mod to your DayZ server, you need to merge the mod's types.xml with
your existing loot configuration. The Smart Import system makes this process safe and painless.
Import Workflow
- Open your main types.xml in the editor
- Drag and drop the mod's types.xml onto the editor (or use the import button)
- Review the preview: The import dialog shows you exactly what will happen:
- 🟢 New items that will be added
- 🟡 Existing items that will be overwritten
- 🔴 Conflicts or warnings to review
- Confirm to merge the items into your data
Warning notices in the import preview help you identify potential issues before they affect your server. Always review warnings before confirming an import.
Error Checking
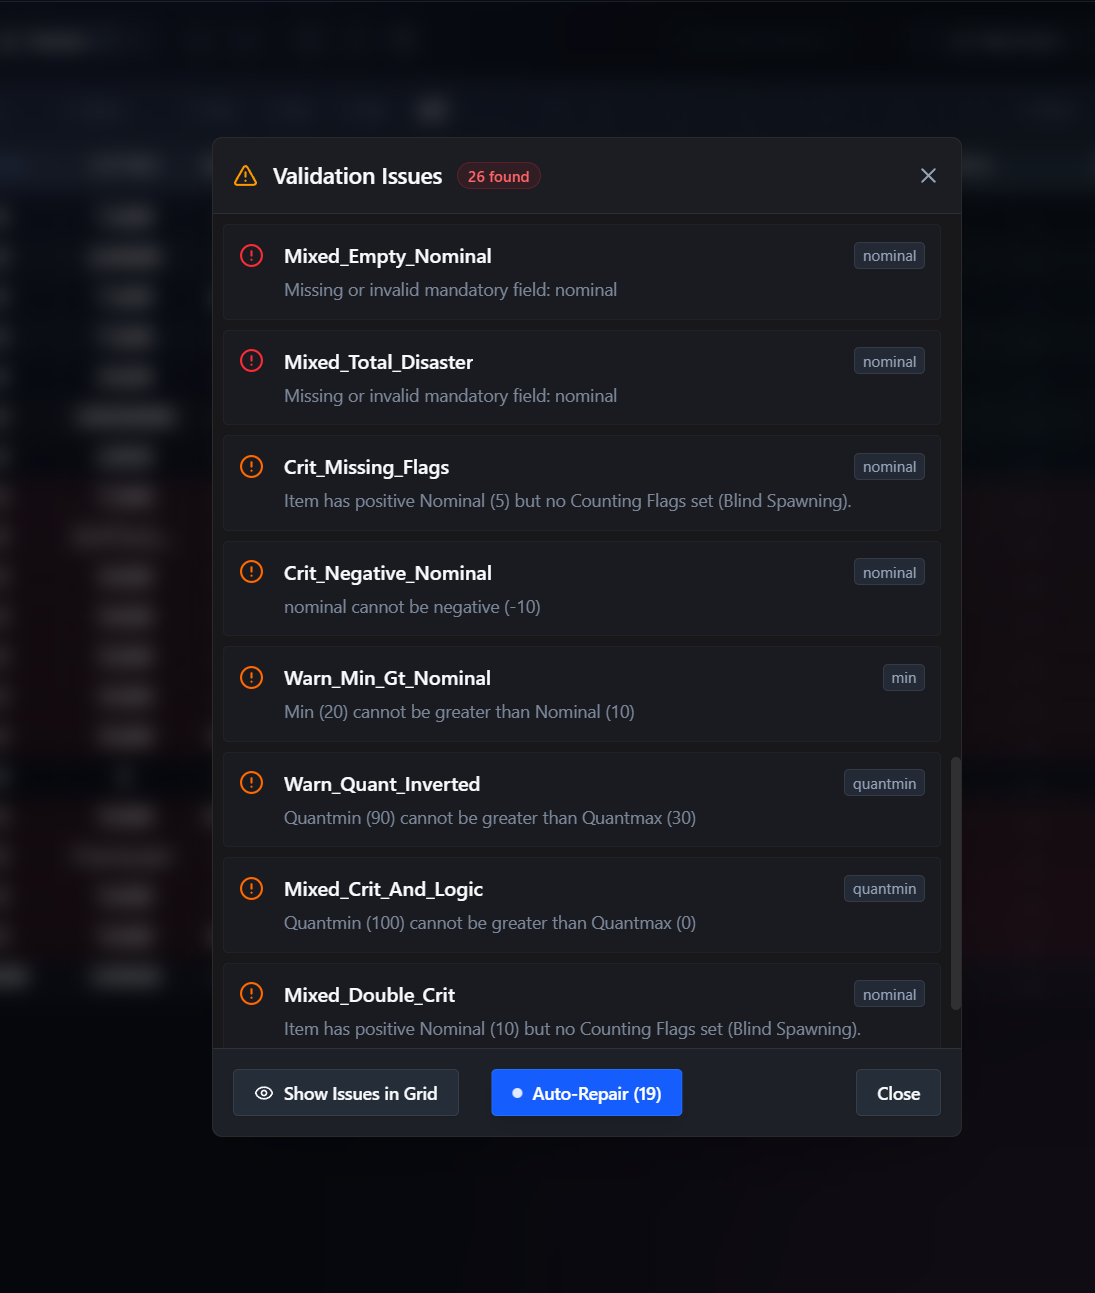
The Loot Editor includes a comprehensive validation system that runs in real-time as you work.
This prevents you from saving a broken types.xml that could crash your DayZ server.
Types of Errors Detected
- Missing Values: Items that are missing required fields like
valuetiers - Invalid Tier Assignments: Incorrect or non-existent tier names
- Logic Errors: Values that don't make sense (e.g.,
mingreater thannominal) - Structural Issues: Invalid category or usage combinations
Fix Modal
When errors are detected, the Fix Modal provides intelligent suggestions to resolve them. Many common issues can be fixed with a single click.
Save Protection
If critical errors are found, the editor will block saving and display the Save Blocked Modal, explaining what needs to be fixed first. This is your safety net against deploying a broken loot configuration.
Drag & Drop
The Loot Editor supports drag and drop throughout the application:
- Start Screen: Drop a
.xmlfile to open it - Add Items View: Drop a mod's
.xmlfile to start the import process - Data Grid: Drop a file directly onto the grid to trigger the import dialog
This deep OS integration means you can work with the editor using the most natural workflow — just drag files from your file explorer and drop them where they need to go.
Context Menu & Online Search
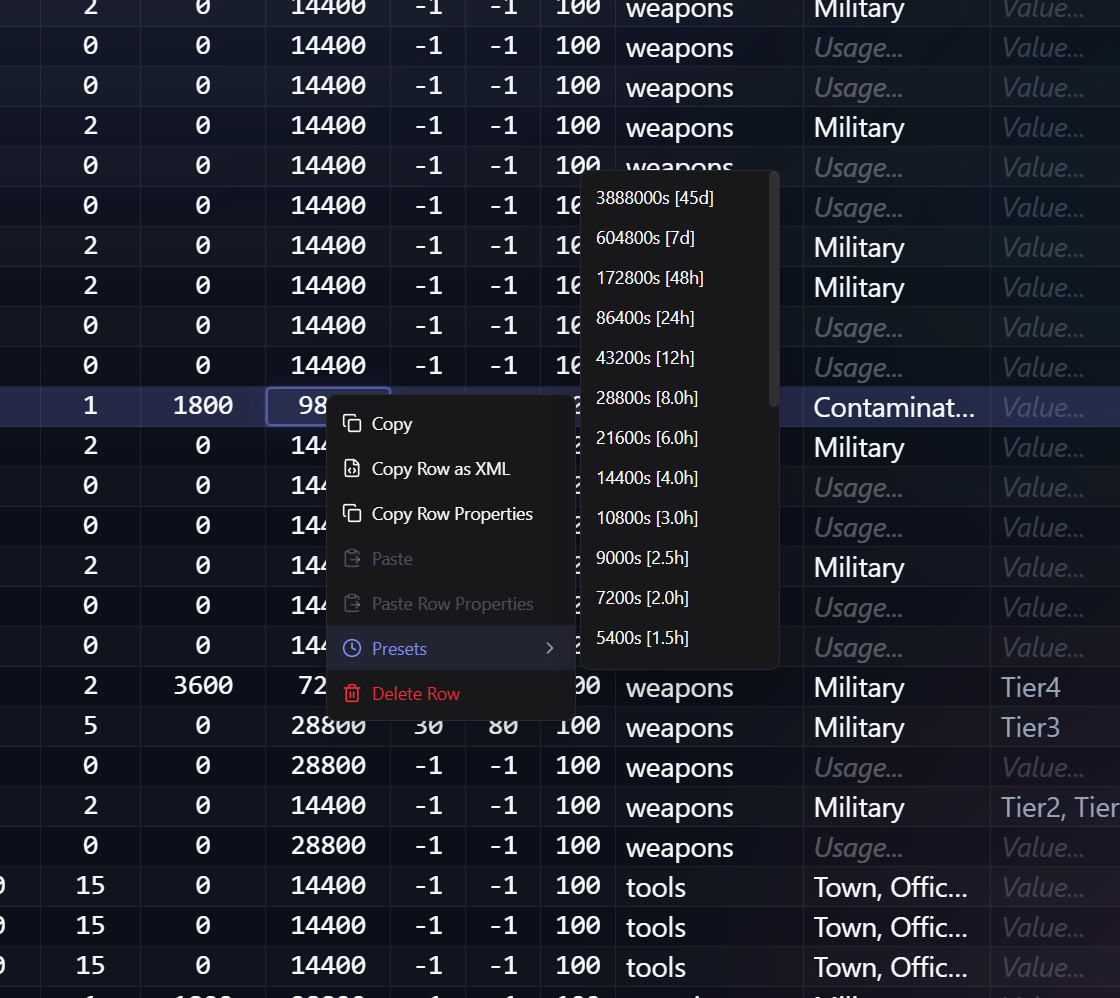
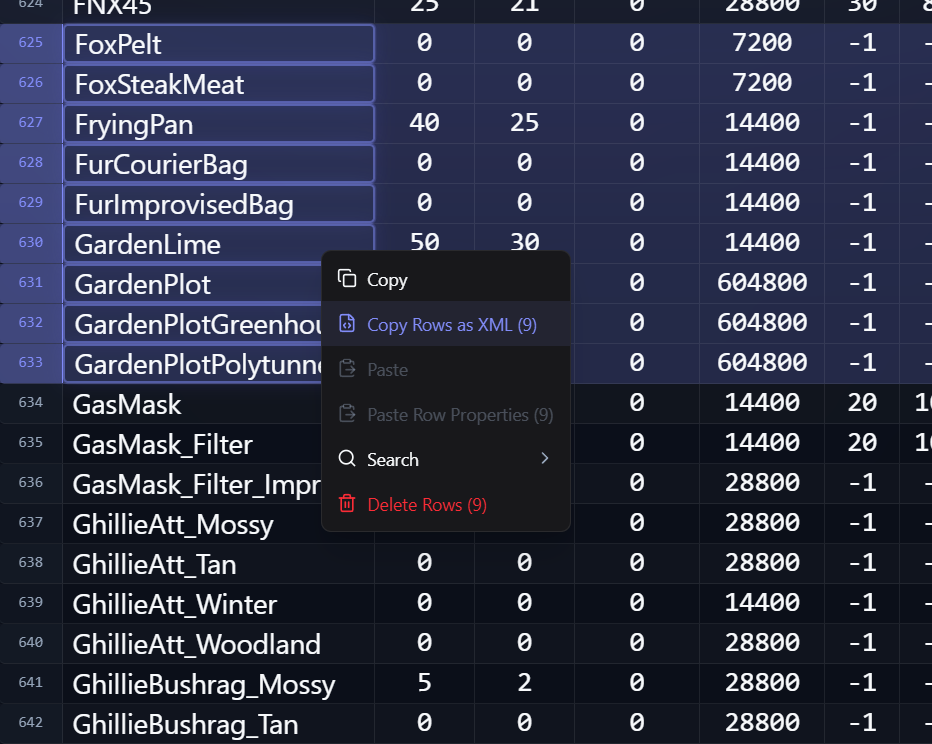
Right-clicking on an item's class name in the grid opens a context menu with useful options:
- Search on Google: Quickly look up an unknown item class name on Google
- Search on DuckDuckGo: Alternative search engine option for privacy-conscious users
- Copy Row as XML: Instantly copy the full XML representation of the selected row
This is especially helpful when working with modded items you're not familiar with or exporting individual rows. Instead of manually copying the class name and searching in your browser, it's just one right-click away.
Settings & Customization
The Loot Editor offers several customization options to tailor the editing experience:
- Dark / Light Mode: Toggle between dark and light themes based on your preference
- Zebra Striping: Enable alternating row colors for better readability in large datasets
- Column Visibility: Show or hide individual columns to focus on the data that matters
Column Reference
Each column in the Data Grid corresponds to a parameter in the DayZ types.xml format.
Here's what each column controls:
| Column | Description |
|---|---|
name
|
The class name of the item (e.g., AKM, BandageDressing) |
nominal
|
Target number of this item that should exist on the map at any time |
lifetime
|
How long (in seconds) the item persists in the world before being cleaned up |
restock
|
Delay (in seconds) before the item can respawn after being picked up |
min
|
Minimum number of this item that must exist before restocking begins |
quantmin
|
Minimum quantity/condition the item spawns with (percentage, -1 = full) |
quantmax
|
Maximum quantity/condition the item spawns with (percentage, -1 = full) |
cost
|
Priority value used for loot spawning — higher values = higher spawn priority |
category
|
The functional category (e.g., weapons, tools, containers, clothes) |
usage
|
Where the item spawns (e.g., Military, Farm, Village, Town, Police) |
value |
The item's rarity tier (affects spawn probability within its usage zones) |
Categories & Usage Zones
Categories
Items can belong to the following categories:
weapons— Firearms, melee weaponstools— Utility items (knives, saws, lockpicks)clothes— Wearable clothing and armorcontainers— Backpacks, bags, pouchesfood— Food and drink itemsvehiclesparts— Vehicle componentsexplosives— Grenades, mines, detonators
Usage Zones
Usage zones determine where on the map items will spawn:
Military— Military bases and campsPolice— Police stationsFarm— Agricultural areasVillage— Small settlementsTown— Larger urban areasIndustrial— Industrial zones and factoriesHunting— Hunting stands and forest areasSchool— SchoolsMedic— Hospitals and medical facilities
Value Tiers
Value tiers control the rarity of items within their spawn zones. DayZ divides the map into four tiers, numbered 1 (coast/starter areas) through 4 (deep inland/high-value areas):
Tier1— Coastal areas, starter zones (common items)Tier2— Outer inland areas (moderate items)Tier3— Deep inland areas (rare items)Tier4— High-security zones, NWAF area (very rare items)
Tip: Use the Loot Editor's "No Value" filter to quickly find items that haven't been assigned to any tier yet — a common issue when importing new mod items.
Common Issues
Items are highlighted in red
Red-highlighted rows indicate validation errors. Hover over the error icon to see the specific
issue. Common causes include missing value tags, invalid category names, or
min values exceeding nominal.
My server still shows old loot after saving
After saving your edited types.xml, you need to restart your DayZ
server
for changes to take effect. The loot economy updates are not applied instantly on a running server.
Imported items don't appear in-game
Make sure the mod is installed and loaded on your server, and that the mod's items use valid
category, usage, and value tags. The Loot Editor's
error checking will warn you about common issues.
Tips & Best Practices
- Always keep a backup: Before making major changes, copy your original
types.xmlto a safe location. - Use Mass Edit wisely: Test with a small percentage change first (e.g., 10%) before making drastic adjustments.
- Check errors before saving: Always resolve all highlighted errors before deploying to your live server.
- Use the Wiki: The built-in Help Modal explains what each parameter does in the game — use it when you're unsure.
- Organize with filters: Use the category and usage filters to work on one item type at a time, reducing cognitive overload.
- Enable Zebra Striping: For large files, turn on alternating row colors in Settings to make the grid easier to read.